
THE CRAFT
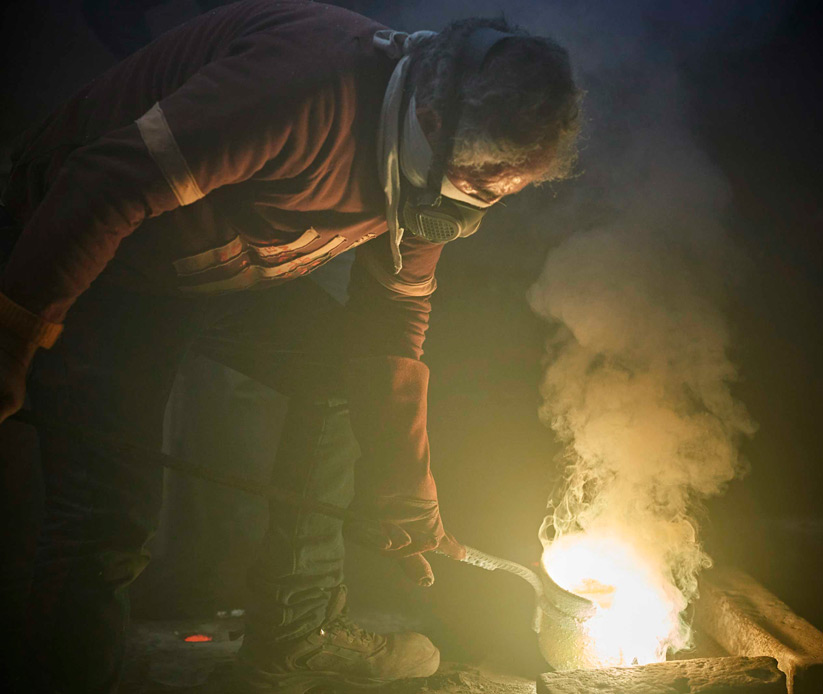
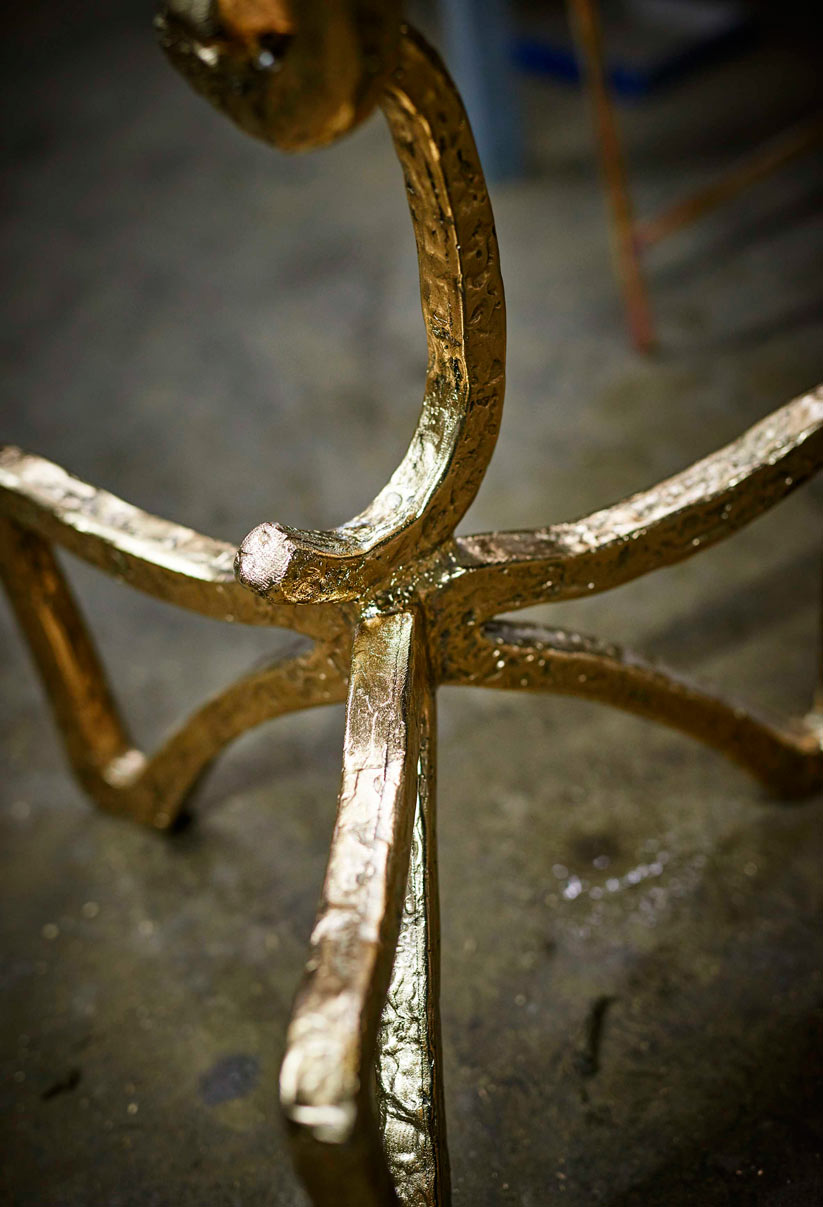
SAND-CASTING
Sand-casting is a centuries-old technique and is one of the simplest ways to replicate the shape of something in metal: it works very well for one-off or small batches of objects, because there is no need to make a permanent mould.
These tree-branch table bases started life as real branches: an aluminium version or ‘pattern’ was made first (the real branch would have deteriorated too much with repeated casting), and that version was then used to create the subsequent bases in brass.
Sand-casting involves coating the pattern in a white powder, to stop it sticking, before it’s laid in a bed of ‘green’ sand, which has clay added to bind it and keep it firm. The pattern is removed, leaving its imprint in the sand, and molten metal is poured in. Once cooled and removed from the sand mould, the tree-branch sections were welded together before being cleaned and sanded to give the desired finish.
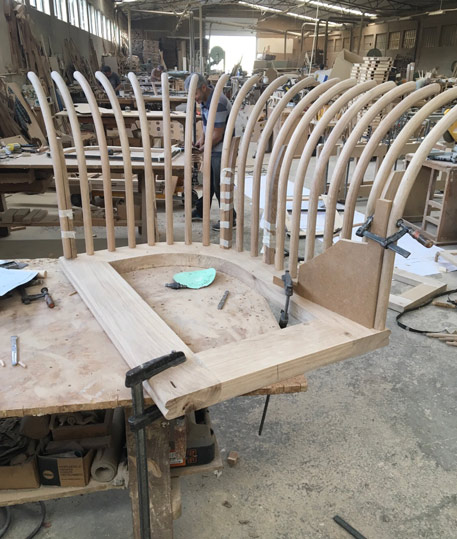
STEAM BENDING
Steam-bending is an old technique used to create curved elements from single pieces of timber. The timber is placed into a steam box to heat it up and soften it; it’s then bent into the desired shape by clamping it onto a jig. Setting the timber in a dehumidifier for a few hours then dries it into its finished curved shape. Steam-bending works best on timbers with long fibres, such as the oak used in the 14 Hills seating. View the project.

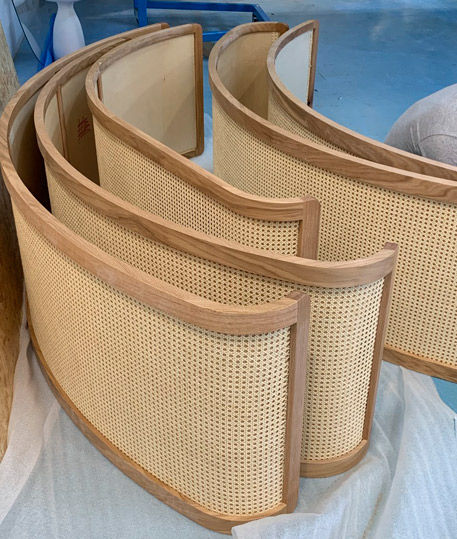
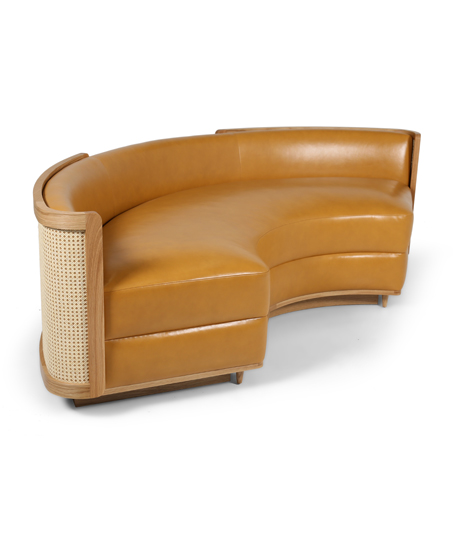
CANEWORK
The cane for the backs of the banquettes was supplied on a roll. The material was steamed a little to make it more supple to be able to wrap around the frame, before being attached by an upholsterer, who fitted the cane around a curved panel on the back of the banquette. For durability, it’s then sprayed with a top-coat of lacquer, to prevent the cane going brittle and fraying. View the project.
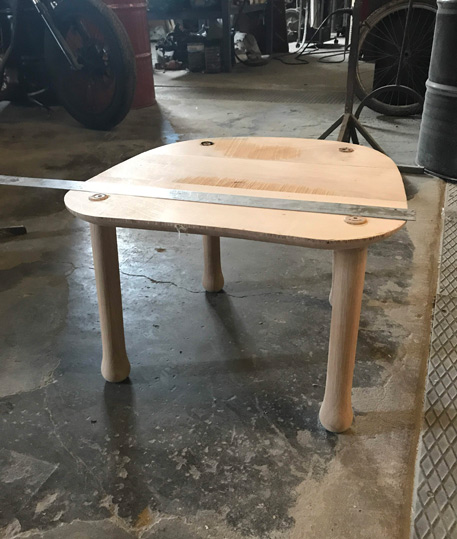
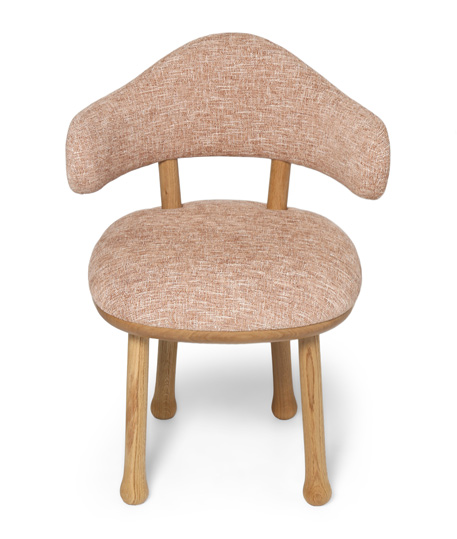
WOODTURNING
The oak legs on this dining chair were machine-turned on a lathe, to ensure that every leg was an exact replica of the other. The design started life as a CAD drawing; a template is then CNC-cut from the drawing, before the timber is turned on a copy lathe where the cutting tool follows the template to create the desired shape. View the project.
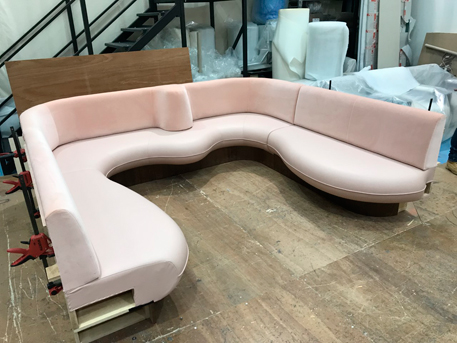
A BESPOKE FIT
To make sure that the banquette was an exact fit for this snug alcove, there was an initial site survey to measure up and template the space, followed by continual coordination with the main contractor. The frame was modelled up in 3D, and the resulting CAD drawing was translated into CNC machined components, which were assembled together to create the frame. The frame was ‘dry fitted’ on-site to double check it was a good fit, before it was upholstered and installed on site. View the project.

3D PRINTING & CASTING
BOS Studios’ chair design, with its integrated ring to hold a tassel, was 3D printed in three sections from a CAD model; these 3D-printed patterns were then finished with a high build polyester lacquer to achieve a totally smooth surface, ready for casting. The pieces are then sand-cast, before the components are welded together and given their final finish.
The undulating band at the top of the table was also sand-cast – the initial mould was 3D-printed in several sections, which were then glued together and the seams filled with resin, to form a single piece that could be cast in one go, with no subsequent welding involved, to give a perfectly smooth finish. Since the metal shrinks by around 1.5% as it cools, the CAD models are digitally enlarged by that amount before producing the 3D printed pattern to allow for this shrinkage. These cast sections are combined with square and round tubular sections of the base, welded together. Cast-crystal tops rest on the centre bars of the table.

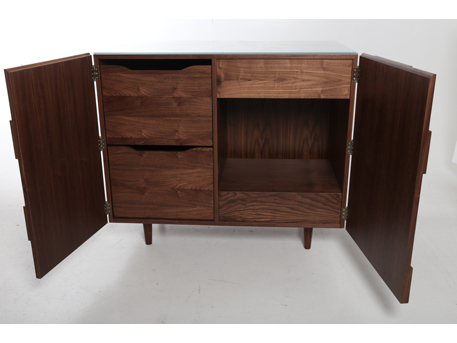
DECORATIVE VENEER
The macassar veneer for these mini bars was so striking, it was crying out to be used in an unusual decorative way. The doors are slightly bow-fronted, so the veneer had to be applied in a vacuum press, which allows it to wrap tightly around the curved surface. Minibar fridge need the correct ventilation apertures to ensure good ventilation – and therefore the appliance’s longevity.
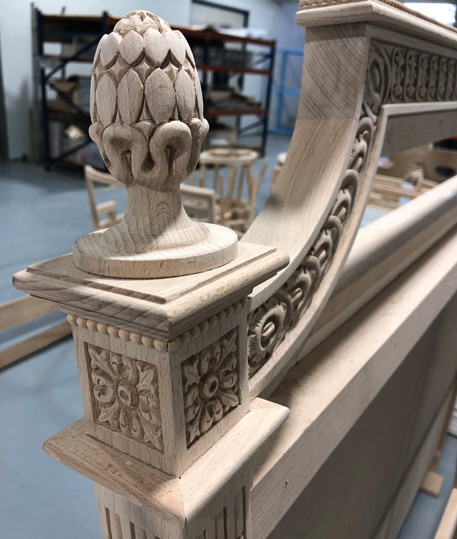
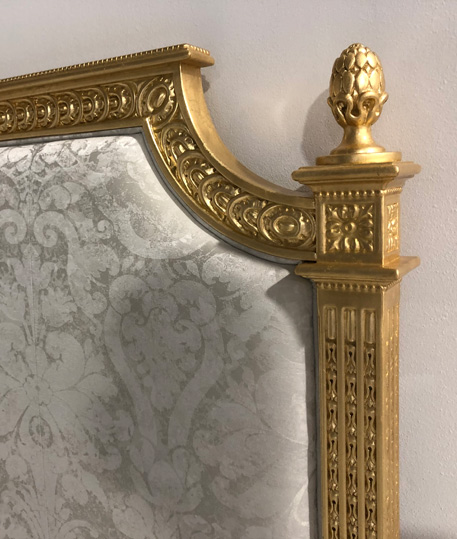
HAND-CARVING & GILDING
Made in Portugal by skilled craftspeople, these headboards were hand carved and gilded. Our client sent us images for inspiration, but in the end it was up to the carvers to devise the suitably ornate design: a sample section including the finial was made up and signed off before the entire headboard was made. After the carving, the headboard was gilded using gold leaf, brushed on and then polished off to create a smooth, even gold surface – the more intricate the design, the more skill is needed to gild the wood.
INTUMESCENT LACQUER
The walnut veneer back on the chairs have an intumescent lacquer: activated by heat, it expands to form a protective foam layer over the wood, preventing the spread of fire. This specialist lacquer wasn’t completely clear, and needed a lot of testing and prototyping to find a way to retain the beauty of the timber while maintaining the particular safety needs of furniture destined to be used on a train.

LASER-CUT MARQUETRY
These Tanganika timber veneers are difficult to work with, because of their very pale, translucent colour – to prevent the substrate material from showing through the Tanganika, we applied a pale sycamore veneer 1st.
The laser-cut marquetry leaves are initially taped together in sheets, which are then pressed on to boards before being cut down to make the table top; a protective filler was applied underneath to make sure that no glue came through when it was pressed. To finish the table tops, a barrier coat is applied to prevent the lacquer discolouring the veneer before several coats of lacquer are applied, with 24 hours of curing time between each. Each layer of lacquer is sanded before the next is applied. The final coat is hand-polished to a glass-like finish. In total, the process for finishing a single table takes about a week.


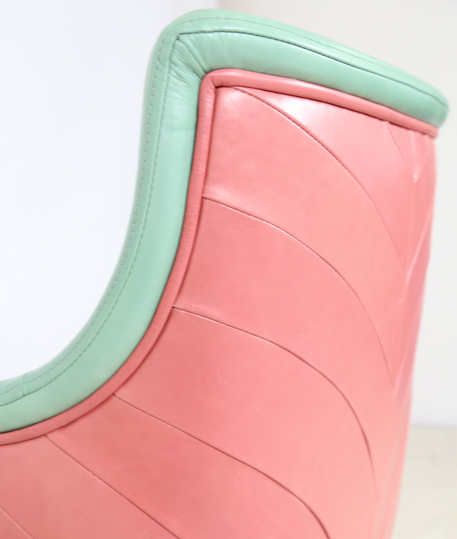
LEATHER-WRAPPED CHAIRS
The Sexy Fish chairs started life as a timber frame, brought to life by some skilled leather upholstery techniques.
The leaf motif that radiates out on the front and back was carefully templated before being replicated across each chair to ensure a neat, tight, uniform finish, while the legs have a top-stitched detail down their length, done by hand, ensuring that each leather casing fits like a glove; the stitching and upholstery alone on the 52 chairs represents 750 hours of work. The chairs are finished by brass sabots, made by push-pointing – compressing a tube of metal into the required shape.